
Installing heavy-duty wheel protection accessories step by step
Preparing for a safe and efficient installation
Before starting the installation process, it is important to ensure the vehicle is parked on a flat surface and properly secured. Heavy-duty trucks require extra caution due to their weight and wheel size. Gathering the right tools in advance, such as gloves, a torque wrench, and cleaning materials, helps make the process smoother and reduces installation errors.
Cleaning the wheel assembly before fitting
A clean surface is essential for proper fitting and long-term performance. Dust, grease, and road debris should be removed thoroughly from the wheel area. This ensures that the accessory sits securely without any obstruction. Cleaning also helps prevent trapped particles that could cause vibration or loosening over time.
Aligning the protection accessory correctly
Once the wheel is prepared, the next step is alignment. Position the protective unit carefully so that it matches the wheel structure evenly. Misalignment can lead to imbalance or poor fitting, especially during long-distance travel. Many modern systems are designed for easy alignment, reducing the risk of incorrect installation.
Securing the system with proper fastening
After alignment, the accessory must be tightly secured using the recommended fastening method. It is important not to overtighten or leave fittings loose, as both can cause performance issues. A balanced tightening pattern ensures even pressure distribution across the wheel surface, improving stability during motion.
Installing axle-level protective components
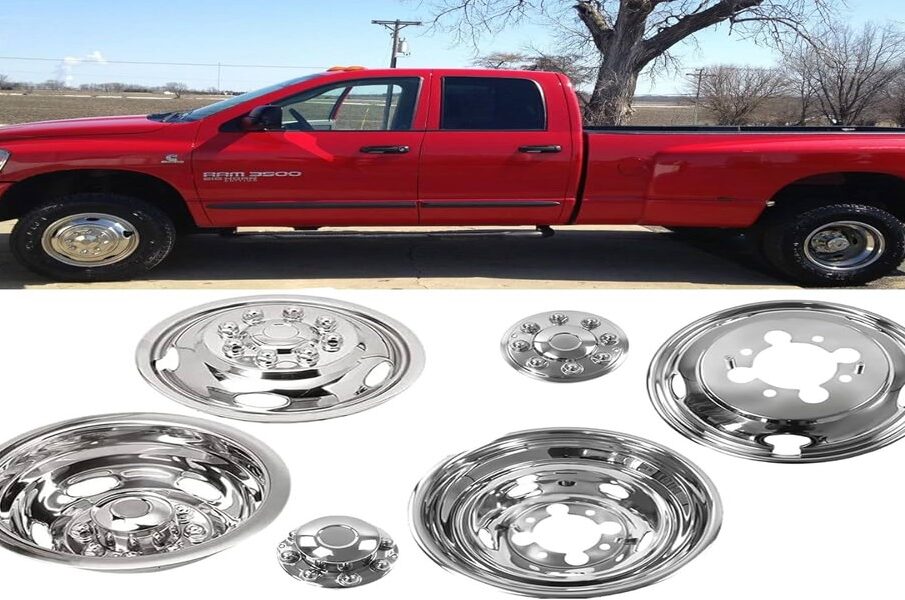
At this stage, additional protective elements can be fitted to complete the setup. These components help shield the axle area from dust, moisture, and road impact. A commonly used solution in this category is DODGE WHEEL SIMULATORS, which are designed to provide a secure fit while enhancing the overall wheel appearance. They also help maintain a uniform and professional look across all vehicle wheels.
Performing safety checks after installation
Once installation is complete, a thorough inspection is necessary. Check for proper alignment, secure fastening, and absence of movement when the wheel is gently tested. It is also recommended to take a short test drive at low speed to ensure stability before resuming regular operations.
Maintenance tips after installation
After fitting heavy-duty wheel protection accessories, routine maintenance becomes easier but still essential. Regular checks should be conducted to ensure fittings remain tight and surfaces are clean. Periodic cleaning helps preserve both appearance and durability, especially for vehicles operating in harsh environments.
Common mistakes to avoid during installation
One common mistake is skipping the cleaning step, which can lead to poor fitting. Another is improper tightening, which may cause vibration during driving. Using incompatible accessories for specific wheel types should also be avoided, as it can affect both safety and performance.


-
Car Cabin Air Filter Replacement and the Link Between Airflow Balance and Cabin Comfort
Every driver desires a smooth ride. You notice the engine sound and ... -
-
-
-


